GetCleft
The software GetCleft (https://github.com/NRGlab/Get_Cleft) was developed for detection of cavities and surface-exposed areas. It is used for biding site definition in FlexAID and NRGRank.
General Settings
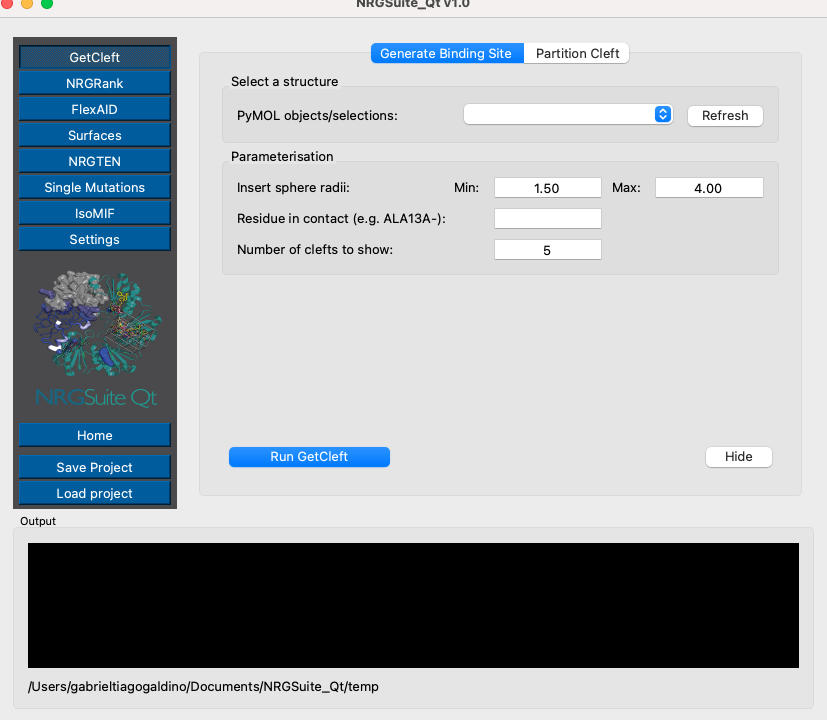
To use it, open the plug-in on the ‘Plugin’ menu in PyMOL click on the ‘GetCleft’ button in the left corner of the window. Load the structure of the target in PyMOL. Press ‘Refresh’ in the ‘Select a structure’ session and the select the target in the ‘PyMOL objects/selections:’ list.
Note
To understand better the parameters of GetCleft read the manual for NRGsuite: http://biophys.umontreal.ca/nrg/ewExternalFiles/NRGsuite_Guide.pdf
The parameters session:
The detection of cavities by GetCleft is based on the introduction of spheres in between pairs of atoms of the target and by reducing the volume of these spheres until no clashes are found. Use the option ‘Insert sphere radii’ (default and recommended Min: 1.50 and Max: 4.0).
If the user wants a specific residue to be in the detected cavity, they must enter the residue identification in the format: “Tree letter code + residue number + chain”. e.g. “ALA13A”
GetCleft will output the top N binding sites defined in “Number of binding sites to show” (default N=5).
Note
When a residue is indicated in the box, only the cavity containing the residue will be generated.
The generated binding sites will be displayed in PyMOL and marked according to their volume in a group called “GetCleft”:

In case a ligand or residue was given as a “Residue in contact” input, only the binding sites in contact with the ligand/residue indicated will be displayed.
Partition Cleft
Once a cavity is generated it is possible to crop it using the “Partition Cleft” tab in “GetCleft” menu. Press the “Refresh” button in the “STEP 1” section o list all binding sites in the PyMOL interface and select the desired binding site.

In the “STEP 2” section click on the “Add” button to add a sphere to the pymol interface. Adjust the size of the sphere by setting its radius in the “Radius:” button. The user can move the sphere along the binding site by clicking on “Move” and following the instructions in the pymol interface:
Note
Mouse: Press Shift + Mouse3 (wheel Click) to move the sphere. Trackpad: Press Command + Mouse click to move the sphere.
To delete the sphere press the button “Delete”. Give a name for the cropped binding site by using the box in the “STEP 3” section. Press “Crop binding site” and the new binding site will be added to the same group as the original binding site:
