NRGRank
NRGRank is a software developed for ultra-massive-high-throughput screening using a scoring function derived from FlexAID.
Note
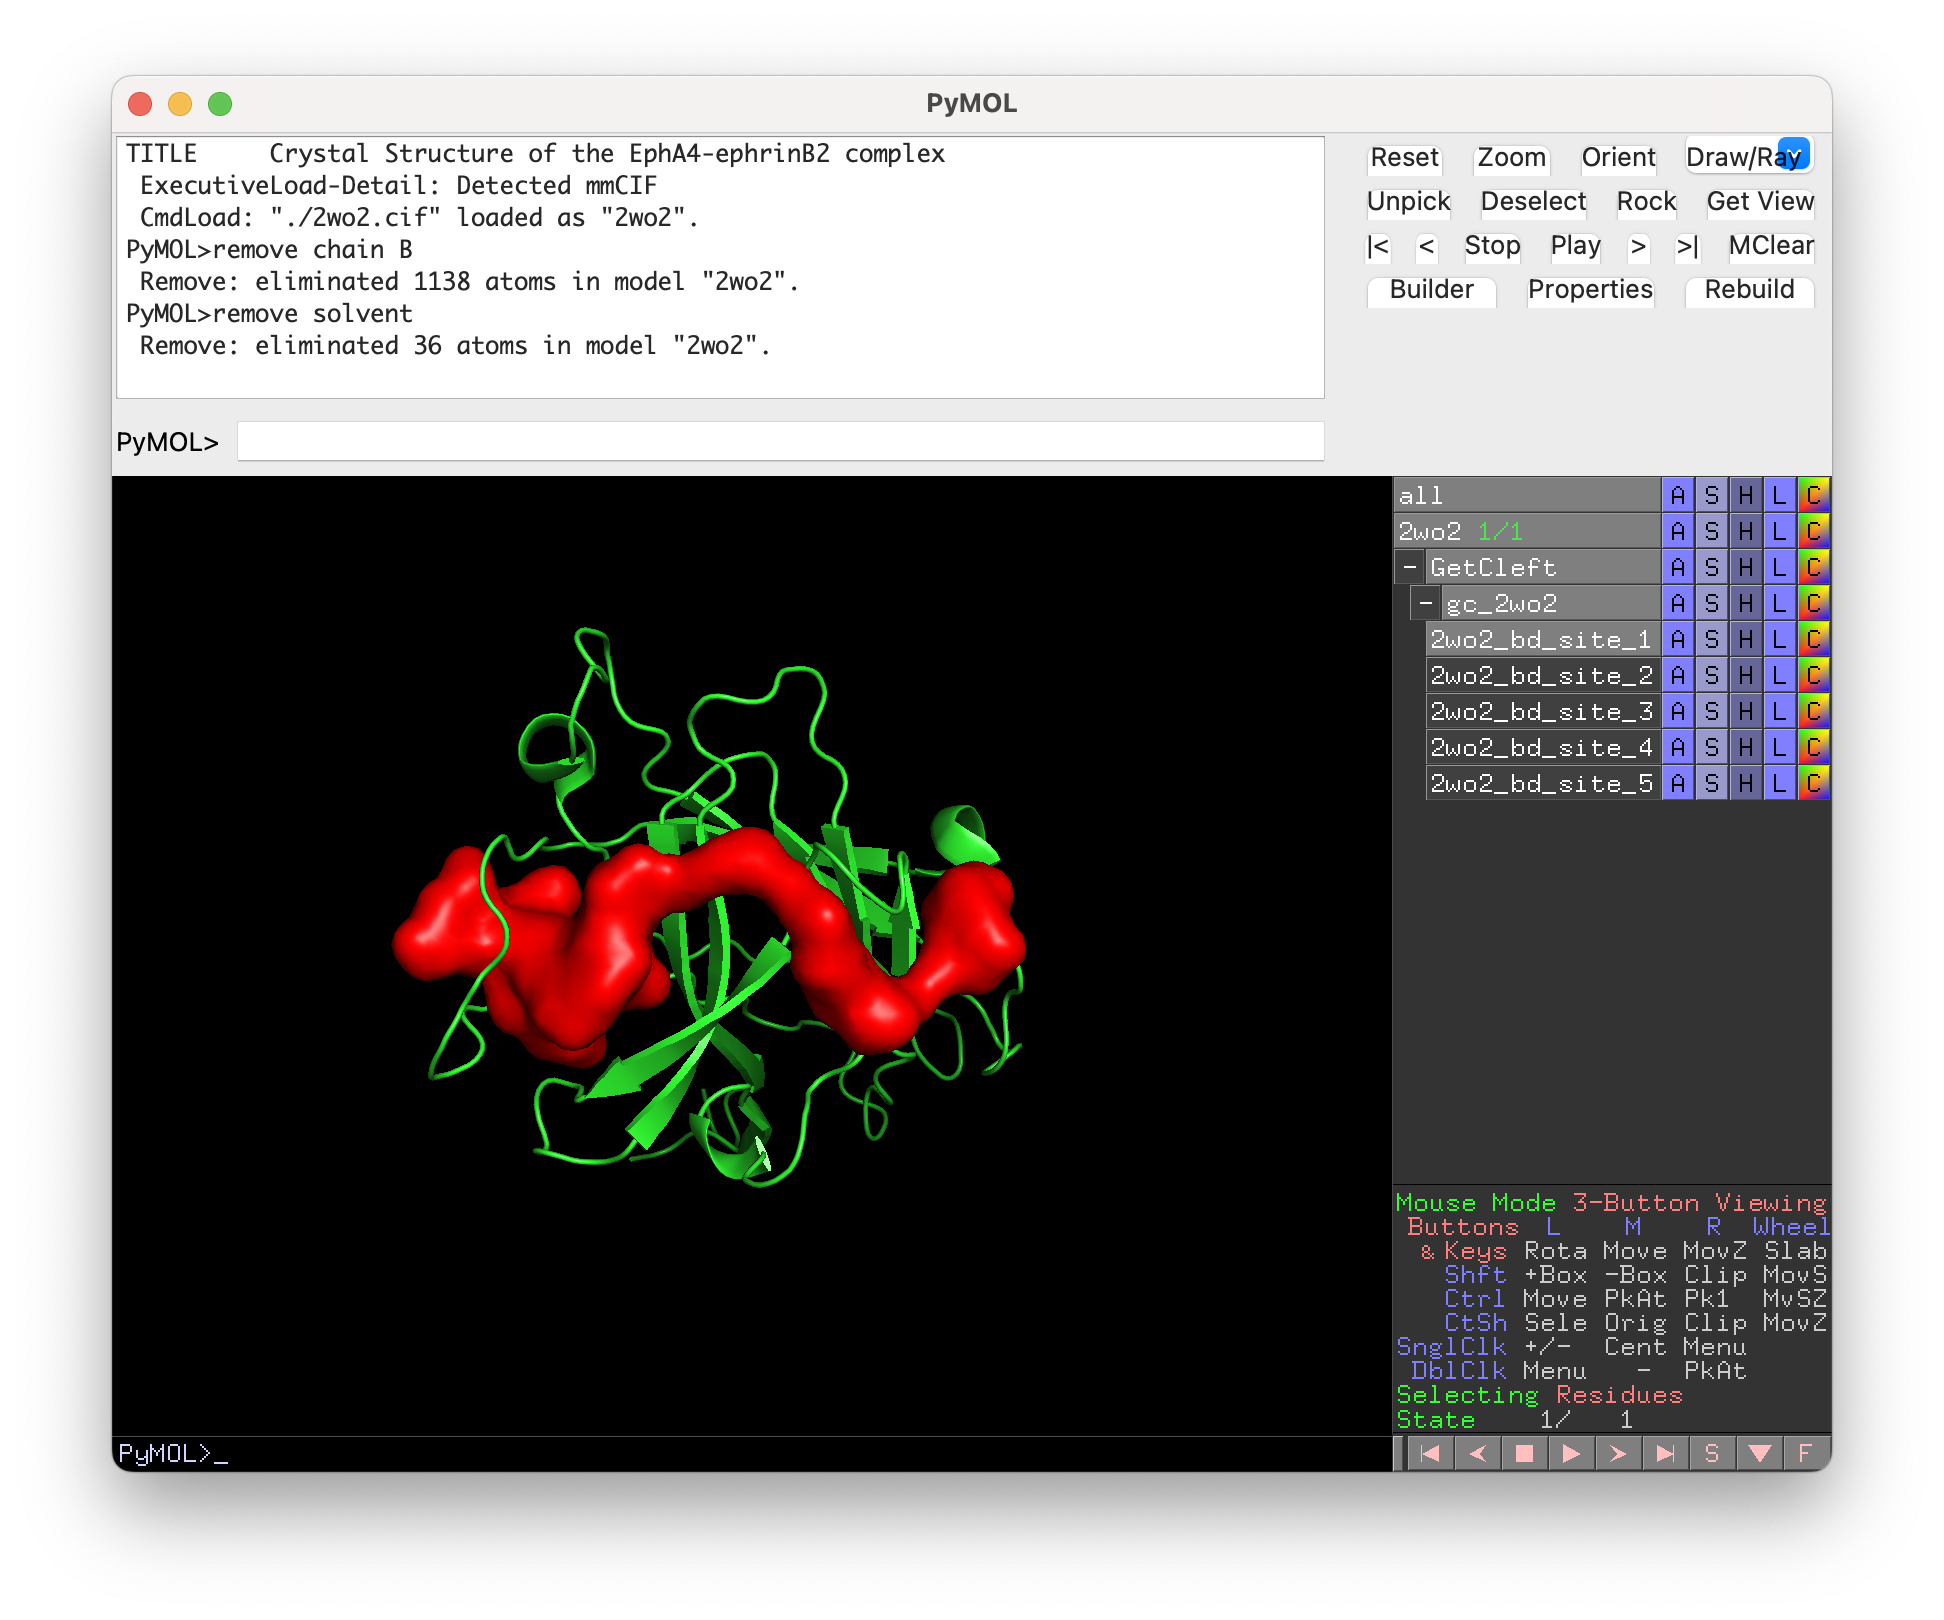
To use NRGRank, the target object and target cleft (see how to generate clefts in GetCleft) should be loaded in the PyMOL interface.
General Settings
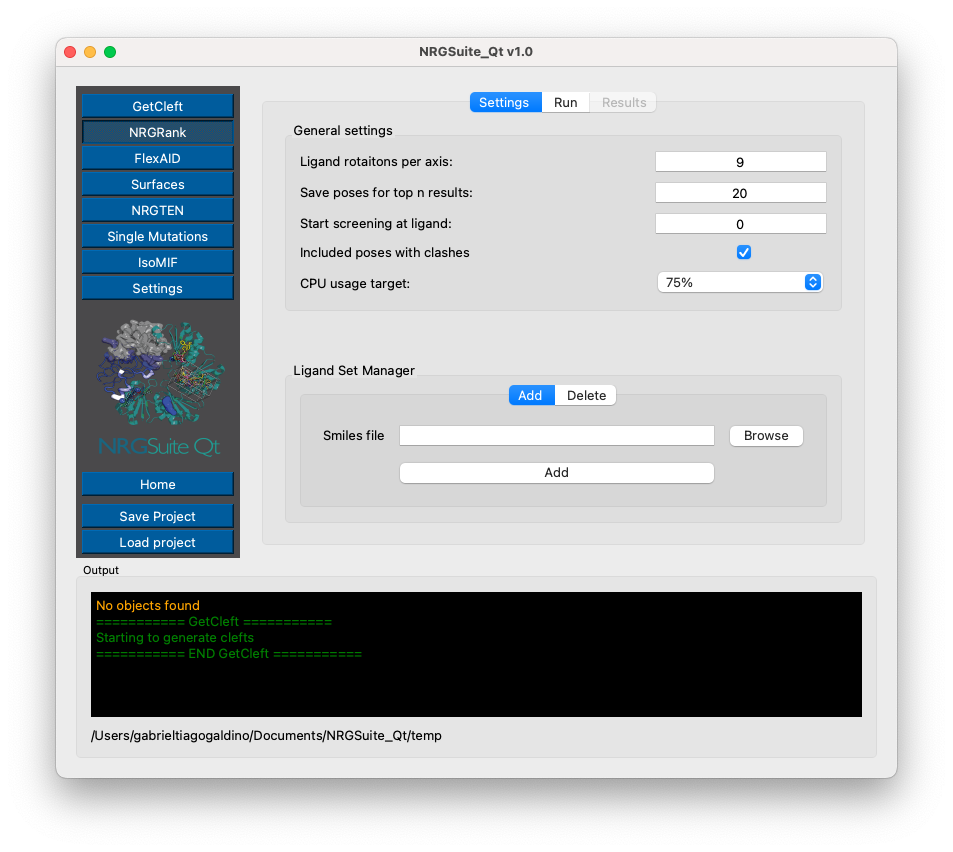
Click on the ‘NRGRank’ button on the left menu of the plugin.
In the ‘Settings’ tab:
Within the ‘General Settings’ section, select the number of ‘Ligand rotations per axis’ (default and recommended: 9).
Select the number of top n poses to be shown in the PyMOL interface at the end of the simulation in the box: “Save poses for top n results:”.
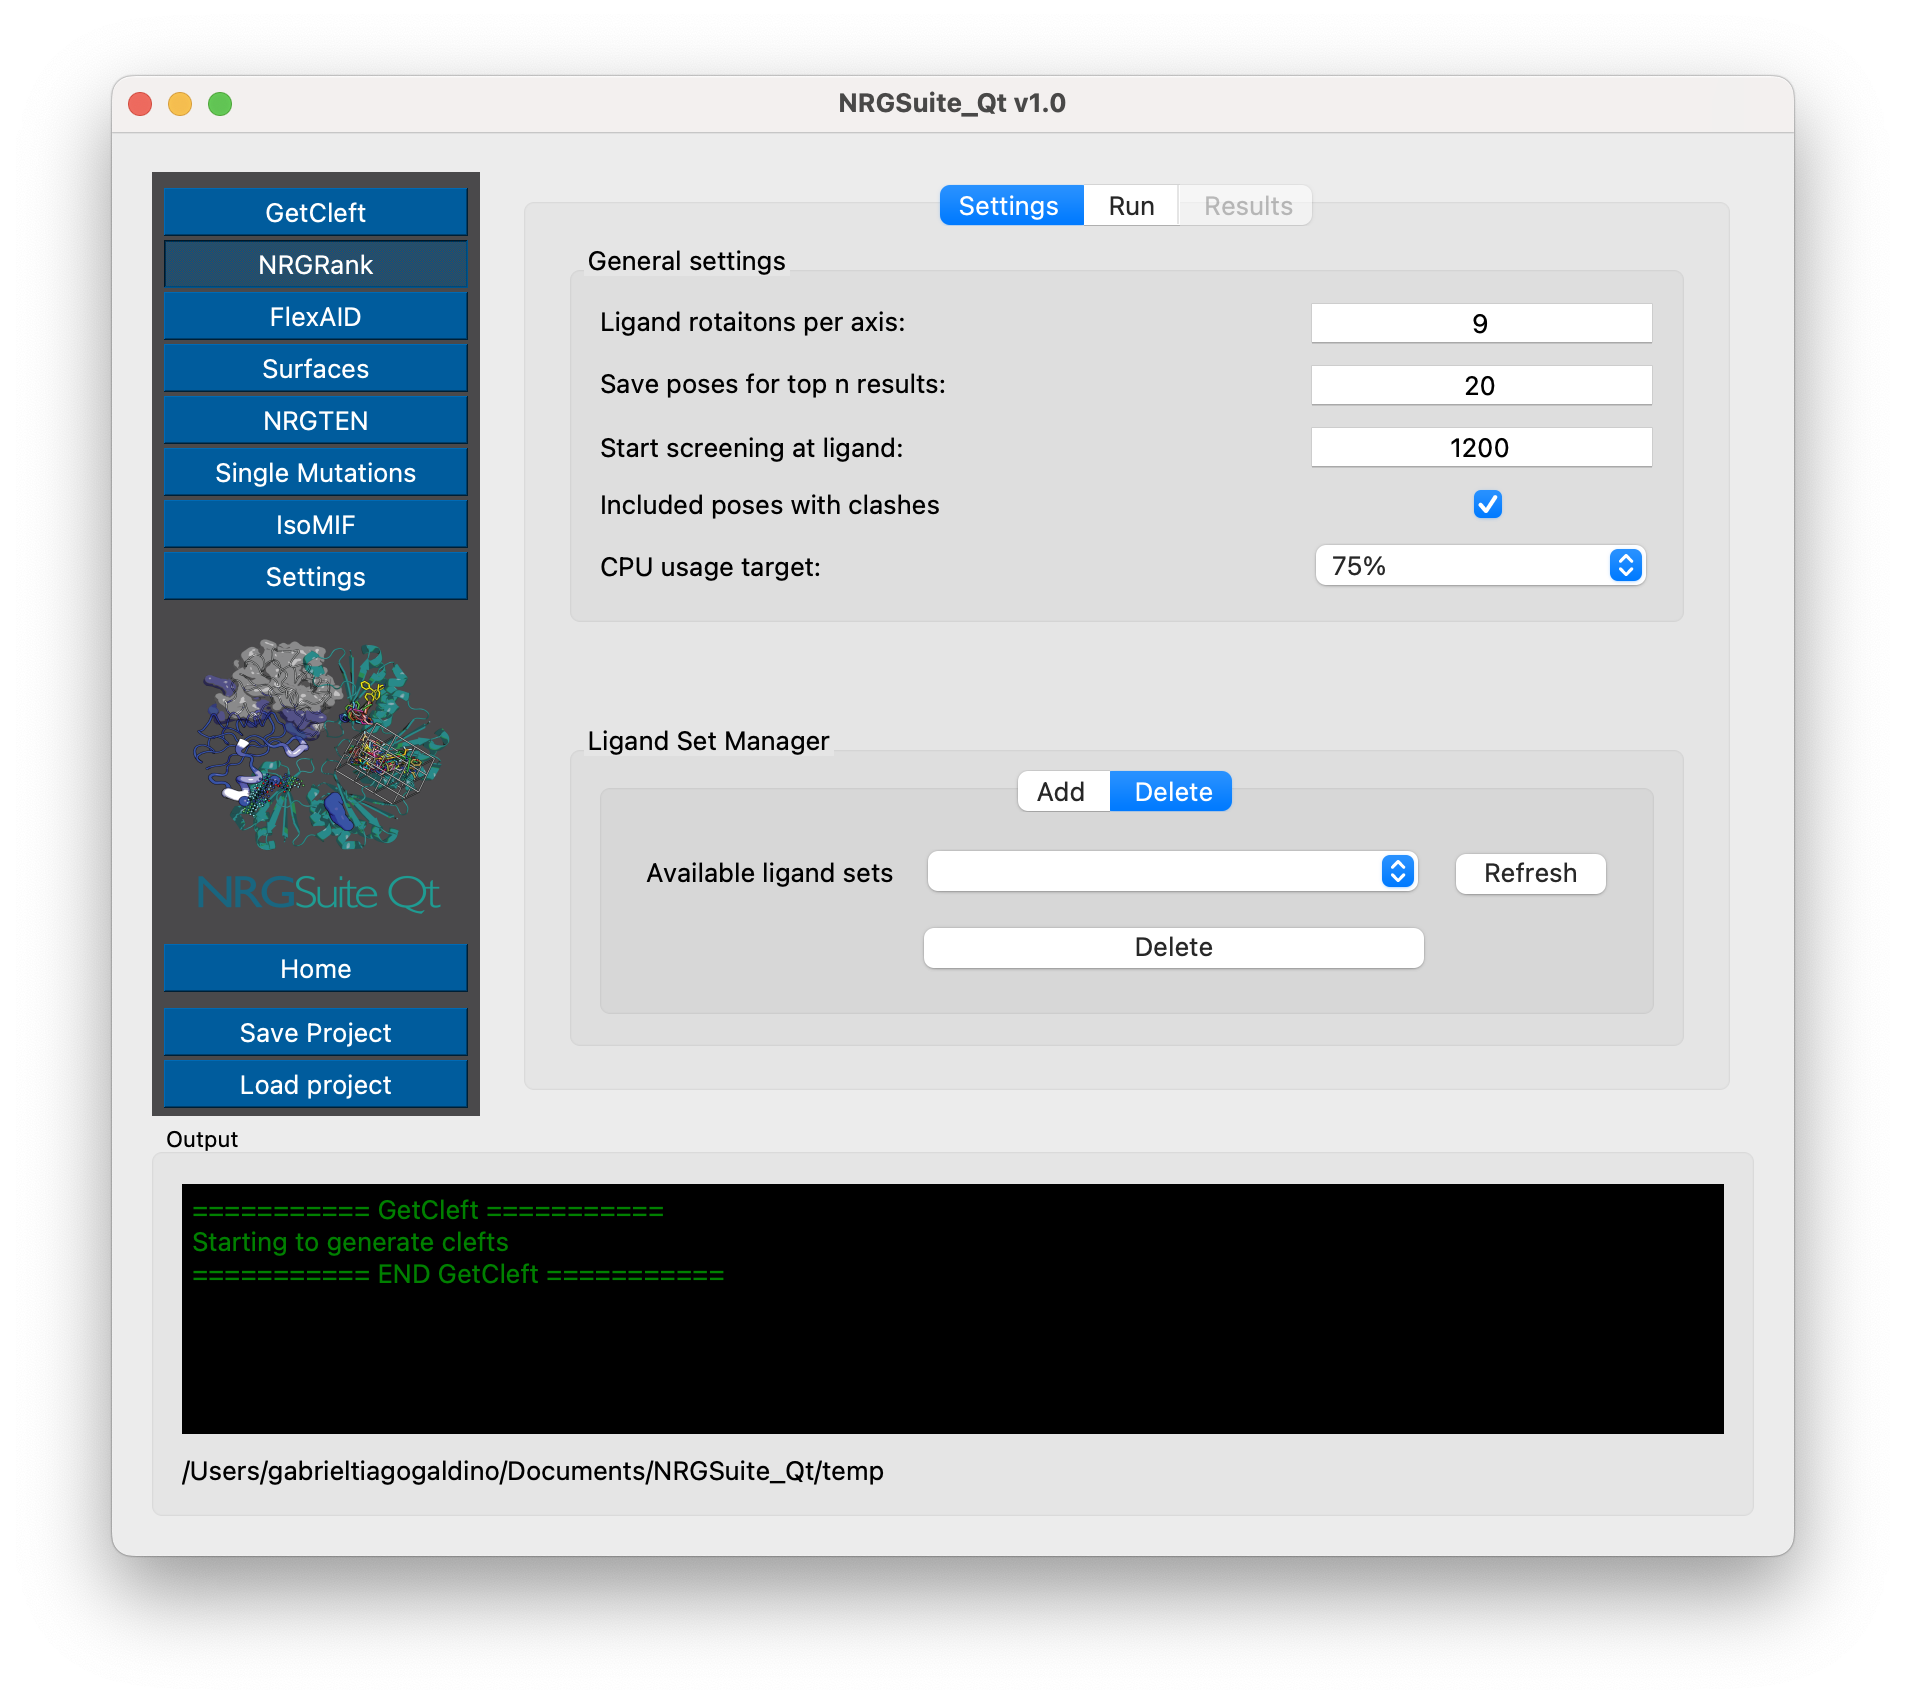
To start screening from a certain ligand in the ligand set instead of screening the whole data set, choose the starting ligand in the box: “Start screening at ligand:”
Select the desired CPU usage for the screening at the “CPU usage target” list.
Ligand Sets
By default, three common data sets are provided: ‘DrugBank FDA’, containing all FDA-approved drugs available in DrugBank, ‘PDB Small Ligands’, containing all small molecules available in the Chemical Component Dictionary, and “Tetrapeptides”, which includes all 16,000 tetrapeptides provided by Prasasty et al. 2019.
The list of all other ligands to be tested should be provided in a file in SMILES format (‘.smi’) and added in the section ‘Ligand Set Manager’. This file contains one ligand per line in the format:
“SMILES ID”
Add the SMILES file path to the box ‘Smile File’ or click ‘Browse’ to load it via the file manager. Press ‘Add to This Set’ to add it to your list of ligand sets.
This set can be removed when no longer needed in the ‘Delete’ tab in the same session, by pressing the ‘Refresh’ button and selecting the ligand set to be deleted in the ‘Available Ligand Sets’ box.
Running NRGRank
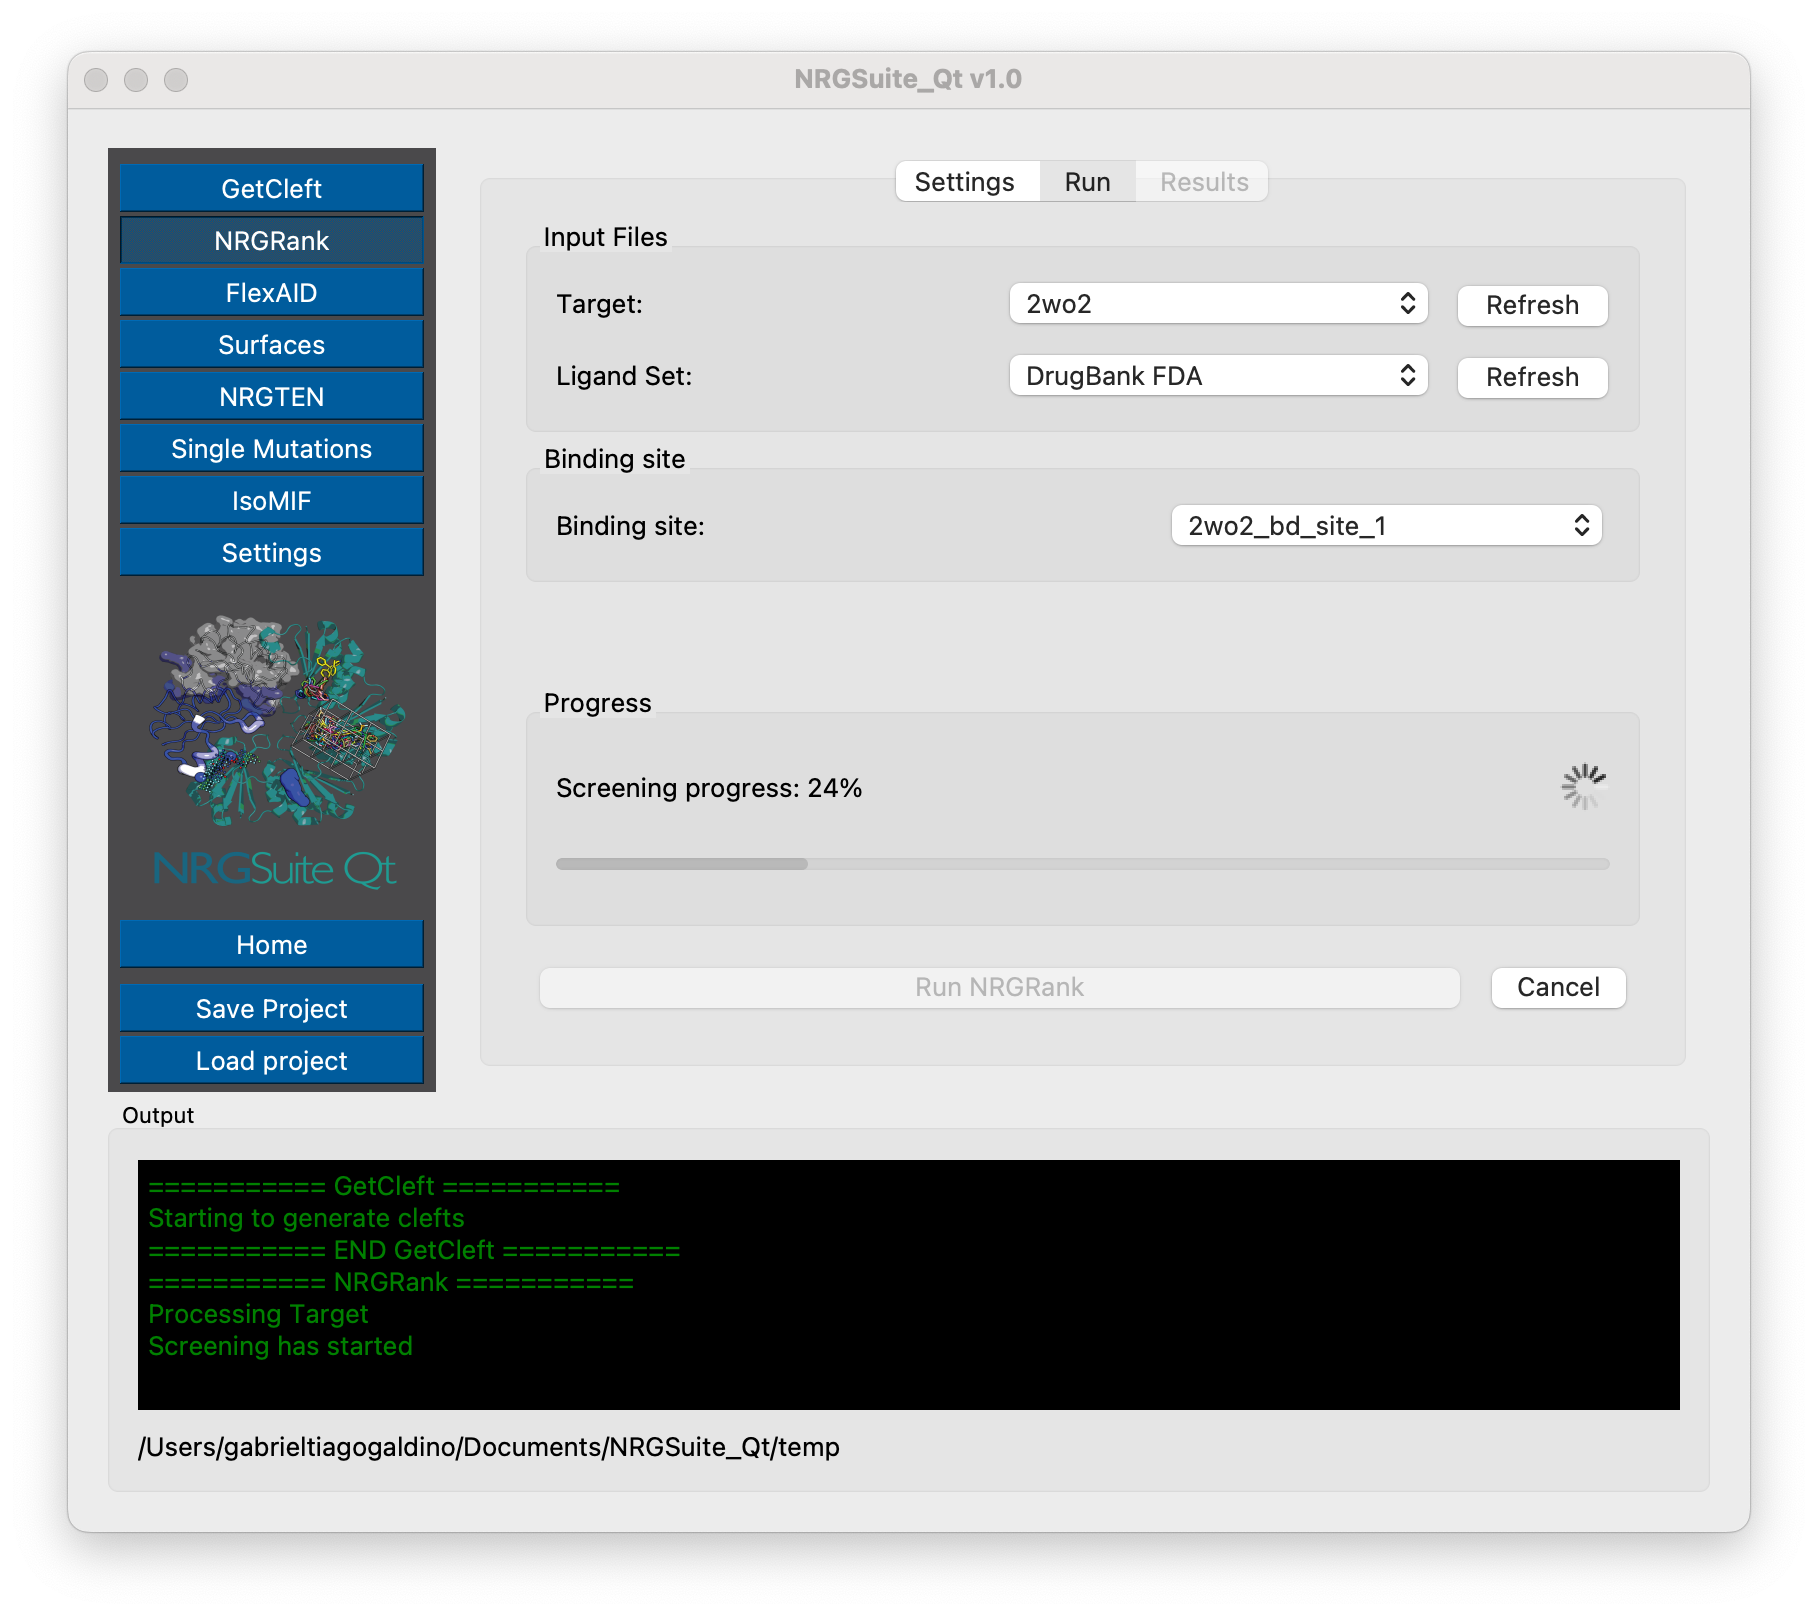
To run ‘NRGRank’, click on the tab ‘Run’ in the ‘NRGRank’ interface.
Press the ‘Refresh’ button in the ‘Target’ list and select the target object previously loaded in PyMOL.
Press the ‘Refresh’ button in the ‘Ligand Set’ list and select the ligand set to be tested (previously added at Ligand sets).
Press the ‘Refresh’ button in the ‘Binding Site’ list and select the cleft object previously loaded in PyMOL (see GetCleft).
To start the simulation, press the ‘Start’ button.
The progress of the simulation can be monitored using the ‘Progress’ bar and the ‘Ligand’ counter showing the percentage of ligands tested.
By pressing “Cancel”, the simulation is aborted and no results are saved.
Results
The results from NRGRank are shown in the “Results” tab that automatically opens when the simulation is completed.
A list of IDs and CFs is shown in a table and the Top n ligands poses will show in pymol interface. To show specific results, click on the desired ligand ID, and the result will be shown in the PyMOL interface.
Note
Only ligands within the “Top n results” defined in the settings before the simulation will show in the PyMOL interface.
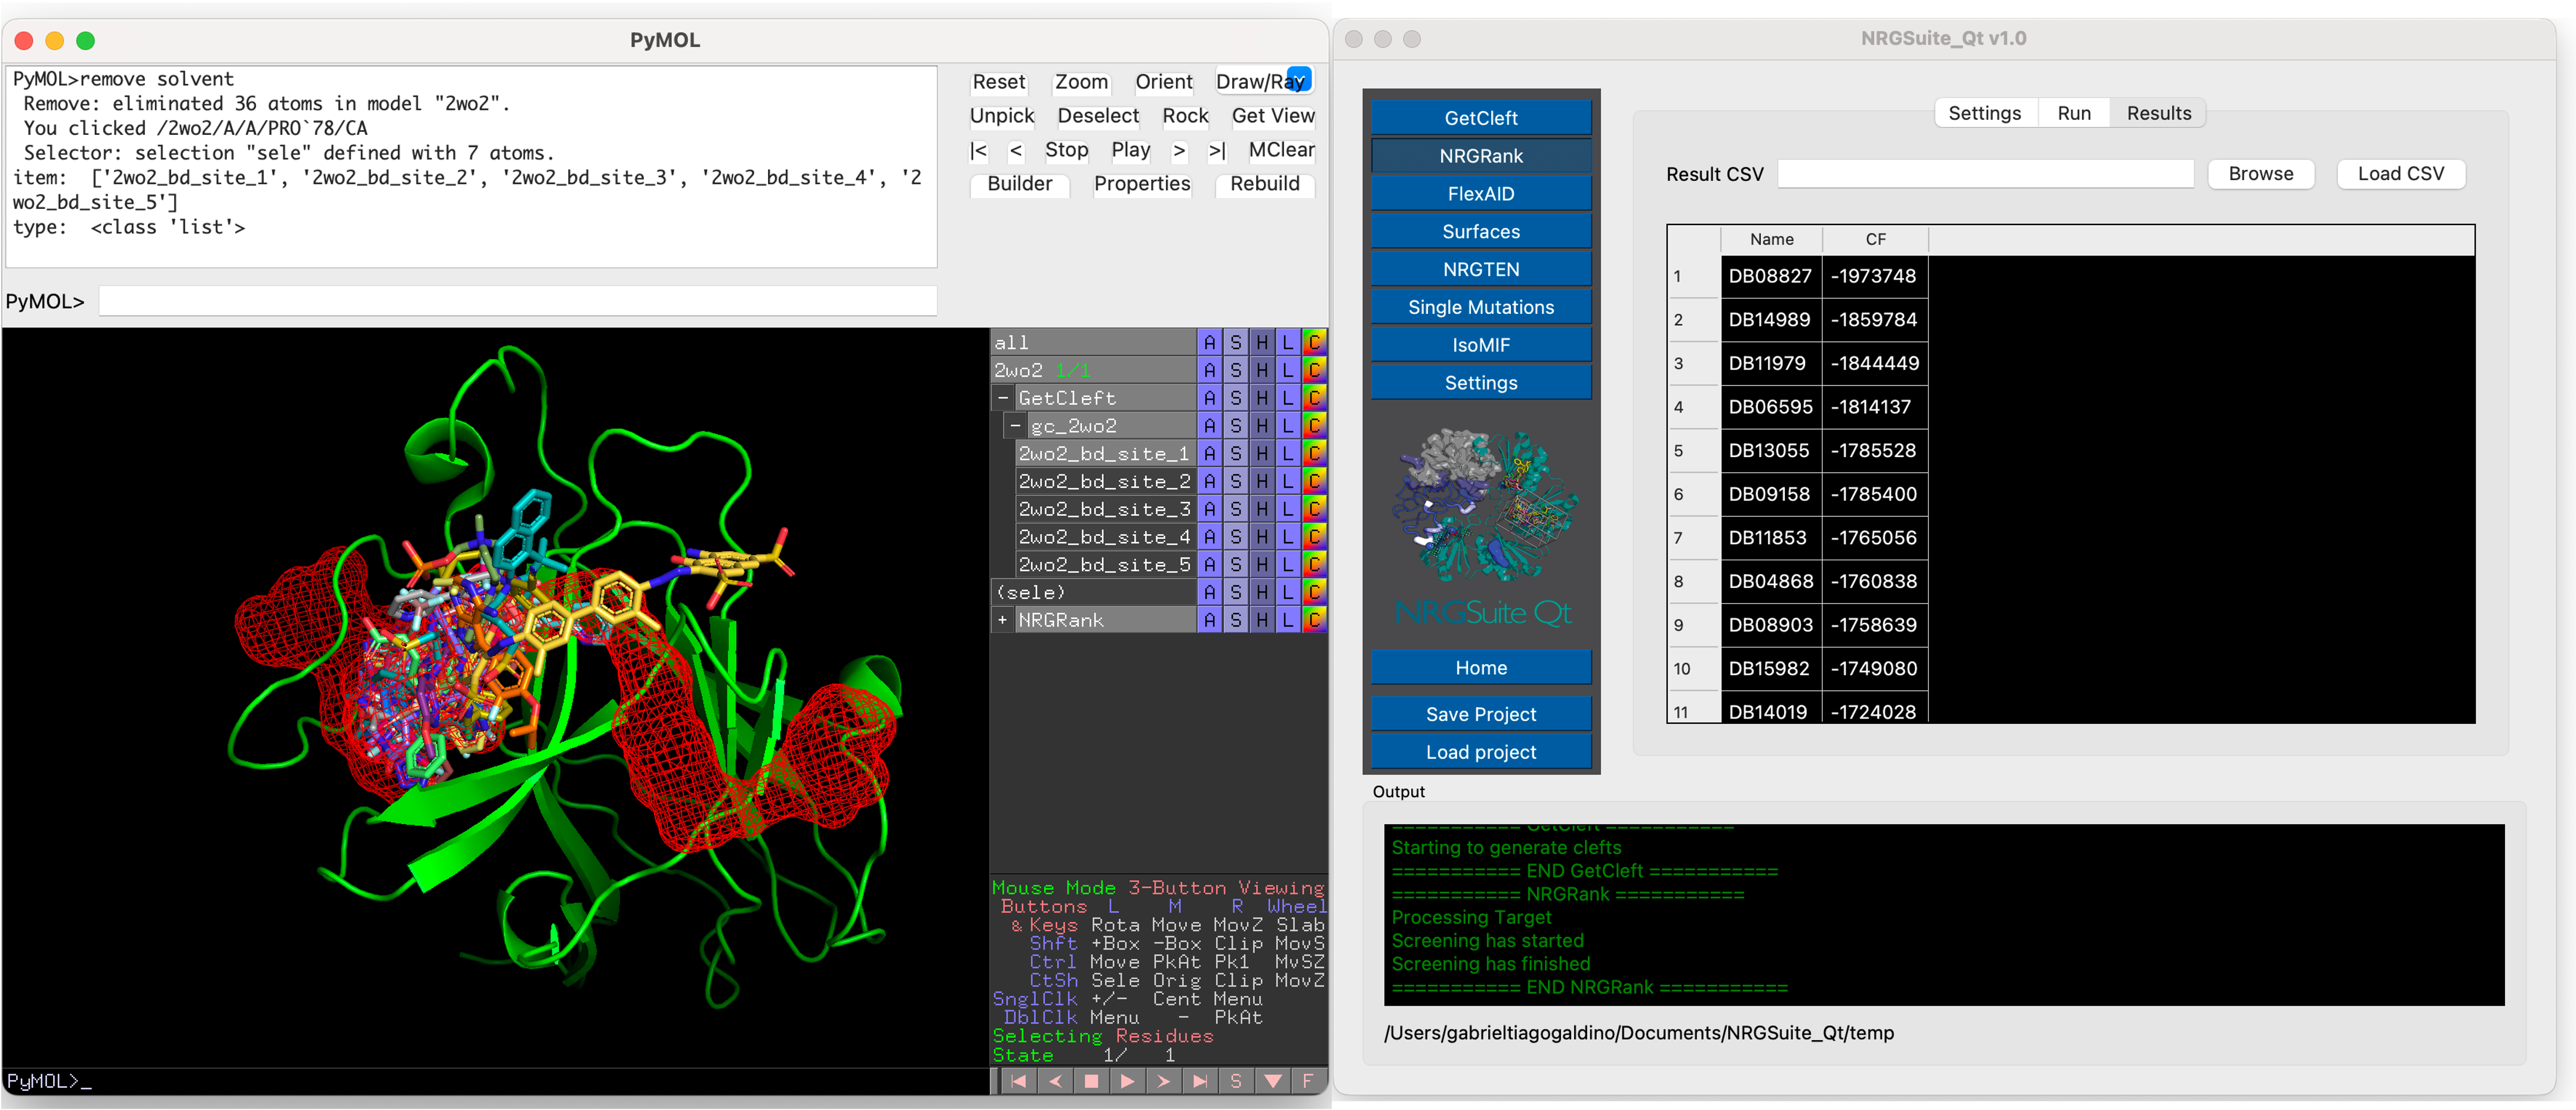
Old results can be loaded by pressing “Browse” and selecting the “.csv” result file and by pressing “Load CSV”.
